How to build a hyper-realistic 3D crab with AI tools
High-quality 3D used to mean days or weeks of manual modeling, retopology, and texturing. Now, with the latest wave of 3D AI tools, you can go from a 2D concept to a hyper-realistic, animated creature in just a few hours – including hair cards and production-ready topology.
In this guide, we’ll walk through a full workflow for creating a hyper-realistic 3D crab: from reference images and high-poly generation to retopology, UVs, texturing, hair card scattering, rigging, and final animation. The same approach works for creatures, characters, and even realistic humans.
Step 1: Plan and prepare strong image references
Good 3D starts with good references. Instead of trying to generate a single perfect image, it helps to split your subject into parts and generate separate views for each. For a crab, that might mean:
Main body (shell)
Front claws
Side legs
Eyes and face area
Close-ups of joints and details
You can use any solid image generator: built-in tools from GPT if you’re subscribed, custom agents, or your own local workflows. The key is to get clean, detailed images with clear shapes and materials, because these will guide your 3D AI later.
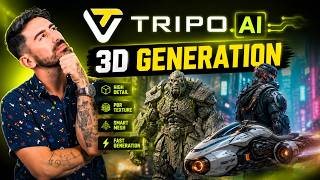
Step 2: Generate high-poly 3D parts with Tripo
Once you have your reference images, the next step is to turn them into detailed 3D meshes. For this workflow, Tripo is used as the main 3D AI engine, because it currently offers:
High-poly mesh generation with strong geometric detail
Retopology (Smart Mesh)
Smart UV unwrapping
Built-in baking for normal maps
For each part of the crab, you generate a high-poly model in Tripo. High-poly is important here because it captures tiny surface details – bumps, ridges, and subtle forms that make the creature feel real.
Other 3D AIs like Hi3D can sometimes produce sharper meshes, but Tripo currently tends to follow the reference image more accurately, especially for organic shapes. That’s why it’s used for the base high-poly here.
Step 3: Assemble the creature in Blender
After generating the separate parts, you bring them into Blender to assemble the full creature. This is where you:
Position and scale each part (shell, legs, claws, eyes) so they all line up
Use mirroring to avoid redundant work (e.g., build one side leg and mirror it)
Check proportions and overall silhouette
At this stage, the crab can already look pretty good, but it’s still heavy and not ready for animation or game engines. That’s why optimization is next.
Step 4: Retopology with Tripo Smart Mesh
High-poly meshes are great for detail but terrible for performance. To make the crab usable in Unreal Engine, Unity, or for animation, you need a clean, optimized mesh – this is where Tripo’s Smart Mesh P1 comes in.
The workflow is:
Export your high-poly parts from Blender
Upload them back into Tripo
Use Smart Mesh P1 to generate a low- or mid-poly version
Choose a reasonable polygon count (e.g., ~30k+ for a hero creature, less for background assets)
Tripo preserves the overall shape and important details while drastically simplifying the mesh. It also bakes a normal map from the high-poly into the new mesh, which is a big bonus.
One caveat: after retopology, the positions of objects may reset, so when you re-import into Blender, you might need to re-align them. It’s a bit annoying but manageable, especially once you’re used to the workflow.
If you’re aiming for AAA-level quality, it can be worth spending a few minutes manually checking the wireframe in tricky areas like joints and bending points. Small manual fixes here can improve deformation and baking quality later.
Step 5: Smart UV unwrapping with Tripo
Before texturing and baking colors, you need UVs. Instead of unwrapping by hand, you can again lean on Tripo’s AI:
Upload your optimized mesh
Use the Smart UV feature
Generate multiple UV options (e.g., 4) and pick the best one
For many models, Tripo’s UVs are surprisingly solid and often good enough out of the box. For more demanding, close-up assets like a hyper-realistic crab, you may still want to:
Inspect the UVs in Blender
Add a few extra seams in problem areas
Check for stretching, especially around joints and highly detailed surfaces
This hybrid approach – AI UVs plus quick manual tweaks – gives you high-quality results without the usual UV pain.
Step 6: Bake color and normal maps with Claude
With retopology and UVs done, it’s time to bake your textures. Instead of doing all the baking manually in Blender, you can now offload a lot of this to Claude (e.g., Claude 3.5 Sonnet / 5.5-style models) using code and image tools.
The idea is:
Provide Claude with your high-poly and low-poly models
Ask it to generate scripts or directly perform baking for:
Normal maps
Color/albedo maps
What used to take close to an hour can now be automated and finished in a few minutes, with Claude handling the tedious setup. You end up with clean normal and color maps ready to plug into your material.
Step 7: Enhance textures with Moondiff
Tripo’s texturing is a strong starting point, but if you want that extra layer of realism, you can refine your textures using Moondiff. The tool is actively updated, has a version 2, and is still usable for free.
The typical Moondiff workflow looks like this:
Upload your texture and reference image
Use inpainting to target specific areas (e.g., joints, shell details, scars, subtle color variations)
Generate higher-detail patches and blend them into the original texture
Because the UVs are good, Moondiff can add fine details exactly where you want them. You can then export the updated texture and plug it back into Blender – or even ask Claude to replace textures programmatically if you’re running a more automated pipeline.
Step 8: Fix remaining artifacts directly in Blender
Even with strong AI tools, there can still be small artifacts – especially around joints or where multiple parts meet. These can show up as:
Weird shading or seams in the normal map
Color mismatches or visible texture borders
For these tiny, targeted fixes, it’s often faster to just fix them by hand in Blender using its texture paint and node tools. This is where basic Blender knowledge pays off: a few minutes of manual cleanup can make the final model look flawless.
Step 9: Generate property maps (roughness, specular, SSS)
To reach a truly realistic look, you need more than just color and normals. Property maps define how light interacts with the surface. Using Claude plus image tools, you can generate maps such as:
Roughness – how glossy or matte each area is
Metallic/specular – how reflective different parts are
Subsurface scattering (SSS) – how light penetrates and scatters within the shell or softer areas
Claude can propose node setups in Blender that combine these maps in sophisticated ways. Some outputs will need adjustment – for example, if it makes the eyes too rough when they should be reflective – but once again, small manual tweaks in Blender can quickly correct that.
Step 10: Add bristles and hair cards on the legs
One of the details that really sells the realism of the crab is the tiny bristles on its legs. Instead of using heavy geometry or full hair systems, you can approximate this with a lightweight “hair card” style approach:
Create a very simple triangular shape to act as a bristle card
Place its UVs on a suitable area of the existing texture and color it appropriately
Use an AI assistant (like Claude with Blender scripting) to scatter these cards along the legs
This keeps the model optimized while adding a lot of perceived detail. The scattering can be automated using modifiers and scripts, so you don’t need to place each bristle by hand.
Step 11: Rig the crab with AI help
Once the mesh and textures are finalized, the next step is rigging. Claude can help here too by generating rigging scripts or guiding the setup of armatures in Blender:
Create a basic bone structure for the crab: body, claws, and leg chains
Bind the mesh to the armature with automatic weights
Optionally refine weights around joints for cleaner deformation
In the described workflow, the rig is fairly simple (for example, a single main bone for some parts), but you can ask for more advanced setups if you plan to do complex animation.
Step 12: Animate and render a cinematic shot
For the final showcase, the crab is animated crawling over a stone in a hyper-realistic macro shot. The process looks like this:
Generate a video reference of a crab crawling using an AI video tool (e.g., Kling, Hi3D video, or similar)
Use that reference to guide the animation in Blender, with Claude helping to script keyframes or constraints if needed
Set up realistic lighting and materials for a macro-style render
Render the final shot with high samples and proper denoising
The end result is a shot that looks like something from a nature documentary: detailed shell, tiny leg bristles, convincing motion, and physically plausible shading.
Why this workflow matters for 3D artists
This crab pipeline shows how far 3D AI has come in just a few months. Tasks that used to be huge time sinks – high-poly sculpting, retopology, UVs, baking, and even rigging – can now be handled or heavily accelerated by AI tools, while artists focus on:
Choosing strong references
Directing the look and feel
Making targeted manual improvements where it really matters
If you’re interested in pushing more of your creative work local and under your control, you might also like guides such as how to run a powerful local AI music generator or setting up your own free AI image API with GPU access. Together, these workflows show how quickly a fully AI-assisted production stack is becoming accessible to individual creators.
Used thoughtfully, this new generation of 3D AI lets you build game-ready creatures and cinematic shots in hours instead of weeks – without sacrificing realism.




Comments
No comments yet. Be the first to share your thoughts!