
Use AI for 3D like a pro: practical workflows and tools
AI-powered 3D tools are evolving so fast that it’s easy to get lost, waste money on subscriptions, or end up with models that are impossible to animate or print. This guide distills hundreds of hours of real-world testing into a clear workflow you can actually use, even on a modest GPU and a tight budget.
Start free and only pay when the workflow works for you
Before you buy any 3D AI subscription, make sure the workflow itself fits your needs. Many tools offer free tiers or trial credits, and you can get surprisingly good results using only free options.
If you don’t have a powerful GPU, use cloud-based tools first. Platforms like Hunyuan and other hosted 3D generators let you experiment without investing in hardware. The main trade-off is processing time, not quality.
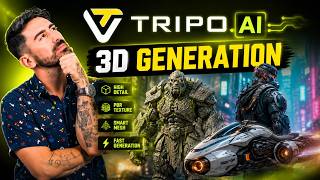
Once you know what kind of output, speed, and features you actually need, then it makes sense to upgrade to a paid plan. One strong paid option is 3D generators like 3DTop (often referred to as "3POP"/"TRIPO" in communities), which are known for stable high-poly and low-poly results and solid retopology. But don’t start there—earn your way up after you’ve validated your workflow with free tools.
Choosing hardware and local workflows
If you want to run 3D AI locally, your GPU and its VRAM are the key constraints. First, check how much VRAM your GPU has (via Device Manager or a quick search). Then pick your workflow accordingly.
For low VRAM (around 6–8 GB):
Use compressed GGUF model variants whenever possible. These are designed to fit into smaller VRAM budgets. There are workflows for tools like TripoSR (often called "Trellis2" in the community) and Pixel 3D that run on 6 GB VRAM with acceptable performance.
For higher VRAM (16–24 GB+):
Use full, uncompressed models and higher-quality workflows. On GPUs like RTX 4090, 5080, or 5090, you can push higher resolutions, more steps, and better detail without running out of memory.
Whenever possible, go with Nvidia GPUs for local 3D AI. Most local workflows are built on CUDA, which only runs on Nvidia cards. AMD support is improving, but Nvidia is still the safest bet if 3D AI is your priority.
Why your image prompts matter more than your settings
Most people obsess over sliders and settings inside 3D AI tools, but the real performance boost comes from better input images. A good reference image is easily half of your final quality.
If you need a model for 3D printing, for example, design your concept image to already look like a 3D print: clear shapes, no tiny floating parts, and a solid silhouette. This encourages the AI to generate watertight, printable geometry with fewer holes.
For realistic models, keep details in the image but make sure:
- The object is evenly lit from all sides
- The background is clean and free of extra objects
- Edges are sharp and shapes are clearly readable
Don’t rely too heavily on “image optimization” buttons inside 3D tools. It’s usually better to clean your image in an image editor or with a dedicated AI image tool first, then feed that into your 3D generator.
Split characters into parts for better detail and rigging
For characters, a single full-body image often leads to soft faces and muddy details. A simple but powerful trick is to generate separate close-up images for the head and other key parts, then assemble them later in Blender or another DCC tool.
You can use tools like Nano Banana or Asset Hub to automatically split an image into parts (head, body, accessories, etc.). There are also separation workflows that run locally. The 3D AI then sees a close-up of the face instead of a tiny head in a full-body shot, which dramatically improves facial details.
The bonus: when parts are generated separately, you often get cleaner UVs and topology per piece, which makes texturing and rigging easier.
Generating rig-ready faces and heads
Rigging faces is hard if your mesh doesn’t have separate eyes, mouth, teeth, and tongue. Many high-poly AI generations merge everything into a single blob, which breaks facial rigs and blendshapes.
One of the few 3D AI systems that currently handles this well is the “Smart Mesh” style generation (often referred to as P1 in tools like 3DTop/3POP). It can output heads with separate eyes, lashes, teeth, tongue, and mouth geometry, making them much easier to rig.
A practical workflow looks like this:
- Generate the face/head with a smart-mesh-capable 3D AI tool
- Import into Blender and clean up the mesh
- Use a rigging add-on (such as a facial rig plugin) to create facial controls and shapekeys
If you already have a high-poly head from another generator, you can still rig it by retopologizing and copying mouth/eye components from another clean model, but using a tool that outputs distinct facial parts from the start will save a lot of time.
Use normal maps as input for sharper details
When your 3D AI outputs feel soft or lacking in fine detail, try this: generate a normal map from your concept image and use that as the input instead of the color image.
Normal maps encode surface direction and shape, which many 3D AIs can interpret more cleanly than raw color. You can generate a normal map with:
- Cloud tools like Nano Banana (e.g., prompt “make a highly detailed normal map” from your concept)
- Local tools or image-to-normal utilities that convert a color image into a normal map
Then feed that normal map into your TripoSR / Pixel 3D workflow. Even at lower resolutions (for example, 512×512 with basic step sizes), you’ll often see noticeably sharper shapes, folds, and micro details.
Save credits by generating multiple objects at once
If you’re paying per generation, don’t waste credits on single tiny assets. Many 3D AIs will happily process multiple objects in one image.
For example, if you’re making environment assets like rocks, bricks, or small props, place two or more variations in a single concept image. Generate them together, then in Blender:
- Import the mesh
- Go to Edit Mode
- Use “Separate by Loose Parts” to split them into individual objects
You’ve just turned one paid generation into multiple usable assets.
Fast, free local tools for 2D concept images
Before you even touch 3D, you’ll often want to iterate quickly on 2D concept art. There are fast, free, local options that work great for this.
Two strong choices are:
- zImage Turbo – a lightweight local image generator with simple controls and quick setup
- Flux client models in ComfyUI – for example, 4B for speed or 9B for higher quality at slightly slower speeds
These tools let you rapidly iterate on ideas, poses, and styles, then feed the best concepts into your 3D pipeline. If you’re interested in broader creative workflows, you might also like this guide on using AI like a pro movie studio.
Always use free retries and multi-output generations
3D AI is still generative and somewhat random. Most paid tools know this and offer free retries or multi-output generations.
For example, some tools let you generate up to five variations at once and choose your favorite, or retry a bad result without paying extra credits. Always take advantage of these features. They’re the easiest way to fight randomness and consistently get good outputs without burning through your budget.
Use AI coding assistants to fix installation issues
Local workflows like TripoSR or Pixel 3D in ComfyUI can be tricky to install. Python versions, missing packages, and dependency mismatches are common problems—but AI coding assistants can handle most of this for you.
Tools like Claude Code or GitHub Copilot-style assistants can:
- Read a GitHub repo (for example, a TripoSR or ComfyUI extension)
- Generate step-by-step installation instructions
- Debug error logs and missing dependencies
A powerful trick is to copy your entire ComfyUI terminal output (including error messages) and paste it into the AI with a prompt like “What is the issue here and how do I fix it?”. With full logs, the assistant can pinpoint missing packages, wrong Python versions, or incorrect environment settings and give you concrete commands to run.
Fixing animation and rigging issues with better topology
Even when a 3D AI claims to output “rig-ready” meshes, the topology around joints is often not ideal. Knees, elbows, and shoulders may have too few edge loops or poorly distributed geometry, which leads to ugly deformations when you animate.
A clean joint needs extra loops around bending areas so the mesh can deform smoothly. If both sides of a knee, for example, have the same sparse loop density, you’ll see sharp creases and collapsing geometry.
To fix this, you’ll need a bit of Blender basics:
- Use retopology tools (in Hunyuan, TripoSR, or other AI tools) to get a cleaner base
- In Blender’s Edit Mode, add supporting edge loops around joints (knees, elbows, shoulders, neck)
- Smooth and adjust the topology so it flows along the limb
You don’t need to become a full-time modeler—just learning a few core tools in Blender can dramatically improve your animations and make Mixamo or AccuRig work much more reliably.
Avoid VRAM crashes by splitting workflows
Complex all-in-one workflows (mesh + texture + rig + animation) are convenient, but they’re also the easiest way to run out of VRAM. A more stable approach is to split your pipeline into stages:
- Stage 1: Generate the high-poly mesh and save it
- Stage 2: Load that mesh into a separate workflow for texturing
- Stage 3: Use another workflow or tool for rigging/animation
Between stages, restart ComfyUI or clear VRAM so each step starts fresh. There are memory-saving nodes in ComfyUI, but nothing beats simply breaking the process into smaller, independent tasks.
Generating low-poly meshes with open-source tools
Low-poly generation is still a weak spot for many open-source 3D AIs, but there are workable solutions. One effective approach is a dedicated low-poly workflow in ComfyUI for tools like TripoSR or Pixel 3D.
A typical low-poly pipeline looks like this:
- Generate a high-poly mesh (for example, ~300k faces)
- Automatically decimate or retopologize down to a target (e.g., 5k faces)
- Reproject or bake textures onto the low-poly mesh
These workflows can run in a couple of minutes on a mid-range GPU like an RTX 5080 and produce game-ready meshes with reasonable topology and textures. They won’t match the absolute best paid tools, but they’re more than good enough for many real-time or mobile use cases.
Preparing AI models for 3D printing
Dropping an AI-generated mesh directly into your slicer is a recipe for frustration: holes, non-manifold geometry, and thin walls can all cause failed prints.
Instead, always pass your model through Blender first:
- Sculpt mode: Fill or smooth holes, reinforce thin areas, and merge stray parts
- Remesh: Turn the model into a single, solid mesh where needed
- 3D Print Toolbox add-on: Enable this built-in Blender add-on to automatically check for non-manifold edges, intersecting faces, and other print issues
The 3D Print Toolbox can also highlight overhangs that will require supports, so you can adjust or smooth those areas before exporting. While many slicers can auto-fix issues, doing it in Blender gives you much more control and reduces the risk of surprises mid-print.
Bake textures from high-poly to low-poly
When you retopologize a high-detail AI mesh into a low-poly version, you don’t want to lose all that surface detail. The solution is texture baking.
A common workflow:
- Generate a detailed high-poly character with your 3D AI tool
- Retopologize and unwrap it (for example, using Hunyuan or another auto-retopo tool)
- Import both high-poly and low-poly meshes into Blender
- Use Cycles to bake color, normal, and displacement maps from the high-poly to the low-poly model
The result is a lightweight mesh with clean quad topology and UVs, but with textures that preserve almost all the high-poly detail. This is essential for games, VR, and any real-time application where performance matters.
If you’re exploring broader AI workflows for creative production, you may also find this guide on using Google AI Studio like a pro helpful for managing prompts, tools, and automation around your 3D pipeline.
Bringing it all together
Using AI for 3D like a pro isn’t about one magic tool—it’s about a smart workflow: start free, choose the right GPU and models, feed the AI great image prompts, split complex tasks into stages, and use Blender for cleanup, retopology, baking, and print prep.
With these practices, you’ll spend less time fighting bugs and broken rigs, and more time actually creating characters, environments, and assets that are ready for animation, games, or 3D printing.







Comments
No comments yet. Be the first to share your thoughts!